How to make a virtual tour for real estate
- All plans
- Computer or phone
- Updated
To make a virtual tour of a home, take one 360 photo in each room, link the photos so buyers can walk from room to room, and share the link. In Vistura you do all of it from Create tour, on the Free plan, with a 360 camera or with your phone.
No 360 camera? Your phone is enough. Vistura Capture takes the 360 photos with your phone, room by room. A whole room, photos included, in under a minute.
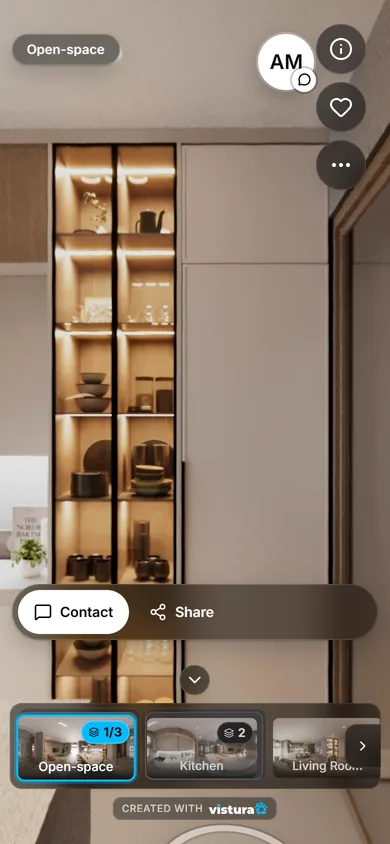
Before you start
You need a phone or a 360 camera, and a free Vistura account: see Sign in and set up your profile.
Steps
1. Plan the rooms and the route
A virtual tour is a walk through the home. Buyers start at one spot, look around, then tap a link to move to the next spot. Plan that walk before you take a single photo.
- Walk through the home once, the way a buyer would, from the front door.
- Note one spot per room. A long or L-shaped room needs two spots, so nothing important hides behind a corner.
- Add a spot in a hall or on a landing when it connects several rooms. Buyers then see how the rooms fit together.
- Write the spots down in walking order: entrance, living room, kitchen, bedrooms, bathroom, balcony.
Shoot in that same order. With your phone, Vistura puts the rooms in the tour in the order you capture them, so the photo list is already sorted when you start building.
Each spot should be near the middle of the room, away from furniture. From there, a 360 photo shows every wall, the floor and the ceiling.
2. Get the home ready
A 360 photo shows everything at once: there is no "behind the camera". Prepare each room before you take its photo, so you do not have to come back.
- Turn on every light, lamps included.
- Open the inside doors. Open doors show where each room leads, and they are where you will place the links.
- Clear the floor around each spot, and put away cables, shoes and bins.
- Put away family photos, letters and anything with a name on it. See Protect the owner's privacy for the rest of the owner's questions.
- Open the curtains before you start, and do not touch them while you capture a room, so the light stays the same in every shot.
- Ask everyone to leave the room, pets included.
3. Take one 360 photo per room
Both ways start from Create tour on your dashboard, which asks where the 360 photos come from.
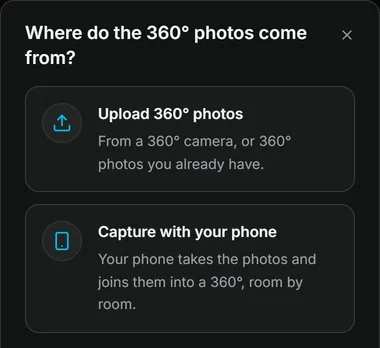
With your phone (Vistura Capture)
Capture runs in the phone's web browser and uses its camera and motion sensors, so there is nothing to install. When it asks, allow the camera and the motion sensors.
- In Vistura on your phone, tap Create tour, then Capture with your phone.
- Tap New property, then Add a room, and pick the room.
- Stand on the spot you planned and tap Start. Turn towards each dot; the phone takes each photo by itself.
- When every room is done, tap Send or download to send them to Vistura.
Keep the phone in one spot and walk round it; to look up or down, tilt only the phone. A tripod is optional; it gives cleaner joins, most of all in bathrooms and other small rooms. The full guide is Take 360 photos with your phone.
With a 360 camera
- Put the camera on a tripod at the same height in every room. Even heights make the walk feel natural, and buyers' measurements come out right.
- Start each photo with the camera's timer or its app, and step out of the room, so you are not in the photo.
- Export the photos from the camera's app as JPEG. A full 360 photo is twice as wide as it is tall.
- In Vistura, select Create tour, then Upload 360° photos, and pick the photos.
More in Use photos from a 360 camera. If the walls lean in a photo, straighten it; to cover the tripod at the bottom of each photo, see Hide the tripod in your 360 photos.
4. Link the rooms in Vistura
The photos are in the editor now, one per spot. Three things turn them into a tour.
Name the rooms. On each photo, select More actions > Rename and type the room's name. Buyers see "Kitchen", not a file name.
Choose where the tour starts. On the photo by the front door, select More actions > Start the tour here. Buyers see this photo first. See Add, replace and download photos.
Link each room to the next. A link is what buyers tap to walk through a door. Open a room's photo and drag the next room's photo onto the door (on a computer), or add a Point on the photo on the door (on a phone). Place each link on the door, at floor level, and link every room both ways. The step by step is in Link the rooms so buyers can walk through.
Your agent card is already on new tours, so buyers can call you or send you a message from inside the tour. To make the tour richer, add notes and photos on the spots that sell the home (a new kitchen, the view), and the price and address in the property details.
5. Share the tour
- In the editor, select Share at the top right. On a phone, it is the share icon.
- Under Who can see it, choose Public. New tours start private, so nobody sees them until you choose.
- Copy the link with Copy, or send it from Send via, such as WhatsApp or email.
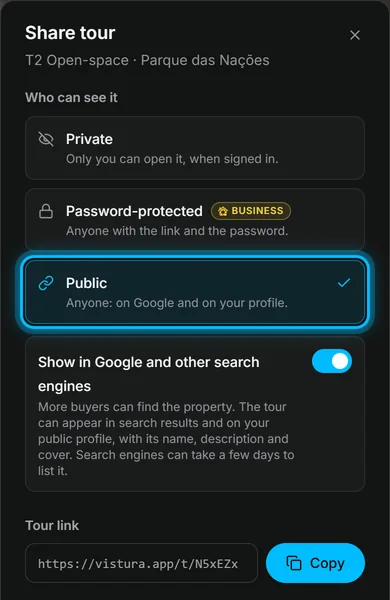
The same dialog has the Tour QR code for flyers and the shop window, and the code to put the tour on your website. Send the link to buyers before a viewing, so they arrive knowing the home.
Result buyers open the link on a phone or a computer, start at the front door and walk from room to room. When someone leaves their details, the lead arrives in Vistura.
Was this helpful?
Thanks for telling us.
Sorry it did not help. Write to us and we will answer: support@vistura.app