Add, replace and download photos
- All plans
- Computer or phone
- Updated
In Vistura, you add 360 photos to a tour from the photo list in the editor, with Upload photos or Add > 360° photos. Each photo (what other apps call a scene or a panorama) is one spot in the home. Select a photo to replace it, download it or start the tour there. It works on every plan, on a phone or a computer.
Before you start
Have your 360 photos ready as JPEG, PNG or WebP files, up to 25 MB each. See File types and sizes.
Steps
Add photos
- Open the tour. On a phone, tap the panel button at the top left to open the photo list.
- Select Upload photos. If the tour already has photos, select Add (the + at the top right on a phone), then 360° photos.
- Pick the photos. You can pick several at once.
- Wait until every photo shows in the list.
On a computer, you can also drag photos from a folder into the editor, or paste them with Ctrl+V. Dropped on a room in the list, they go straight into that room.
New photos go under Not in a room, named after their files. To sort them into rooms, see Organise rooms and floors.
Replace a photo
Use this for a retouched or retaken photo of the same spot.
- Select the photo in the list. Its settings open: on the right on a computer, over the photo on a phone.
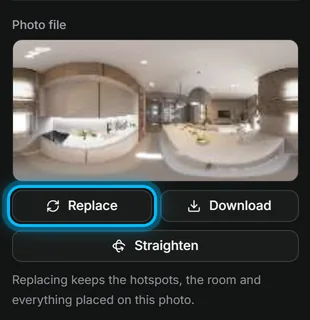
- Under Photo file, select Replace.
- Pick the new file.
The new photo keeps the old one's name, room, links and points.
Download a photo
- Select the photo in the list.
- Under Photo file, select Download.
The file is saved under the photo's name.
Choose where the tour starts
- In the list, select the photo's More actions (the … next to it).
- Select Start the tour here. A star marks the photo.
To change the order, drag photos up or down in the list. Buyers see them in that order.
Result the tour has its photos, each with a clear name, and opens on the photo you chose.
Was this helpful?
Thanks for telling us.
Sorry it did not help. Write to us and we will answer: support@vistura.app
More in this section: Build the tour
- Add, replace and download photos
- Organise rooms and floors
- Name the tour and choose its cover
- Link the rooms so buyers can walk through
- Property details, location and what's nearby
- Add notes, photos and buttons inside a room
- Add or change a contact form
- Add a floor plan to your tour
- Add a video (drone or walk-through)
- Narrate the rooms and run a guided tour