Add a floor plan to your tour
- Plan: Pro
- On a computer
- Updated
In Vistura, you add a floor plan from Add > Floor plan in the tour editor: upload the drawing, place each photo on it and set which way it faces. Floor plans need Pro or Business on your account.
Before you start
Open the tour on a computer, with the plan as a PNG, JPG, WebP or SVG image up to 25 MB. The tour needs a floor: if the photo list has none, select Photos, rooms and floors (the + above the list), then Floor.
Steps
Upload the plan
- In the top bar, select Add > Floor plan. The map appears on the view, and its settings open on the right.
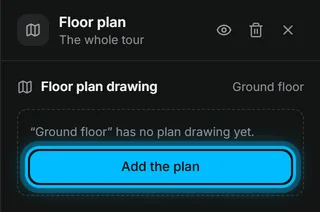
- Under Floor plan drawing, select Add the plan.
- Select Upload floor plan and pick the plan file. The plan screen opens.
Place the photos
- Drag a photo from the list on the left onto its room on the plan. A marker appears there.
- Do the same for every photo. To place a photo without dragging, select it in the list: it lands in the middle of the plan, and you drag the marker into place.
Set the direction of each photo
- Select a marker on the plan.
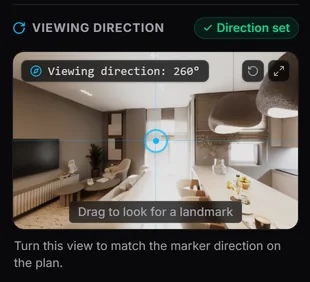
- In the marker's settings on the right, under Viewing direction, drag the small 360 view until a door or a window is in the middle.
- On the plan, drag the marker's arrow so it points at that same door or window.
- Check that its settings show Direction set, then select the next marker.
- When every photo has its direction, select Back to tour.
Result buyers see the plan in a corner of the tour, with where they are on it and the way they face. Tapping a marker takes them to that room. On a phone, the plan opens with a tap.
Was this helpful?
Thanks for telling us.
Sorry it did not help. Write to us and we will answer: support@vistura.app
More in this section: Build the tour
- Add, replace and download photos
- Organise rooms and floors
- Name the tour and choose its cover
- Link the rooms so buyers can walk through
- Property details, location and what's nearby
- Add notes, photos and buttons inside a room
- Add or change a contact form
- Add a floor plan to your tour
- Add a video (drone or walk-through)
- Narrate the rooms and run a guided tour