Name the tour and choose its cover
- All plans
- Computer or phone
- Updated
In Vistura, a tour's name, description and cover live in Tour settings > General. They are what people see before they open the tour: in the preview when you send the link, on Google and on your dashboard. It works on every plan.
Before you start
Open the tour in the editor. On a phone, open the photo list with the panel button at the top left.
Steps
Name and describe the tour
- At the top of the photo list, select Tour settings (the gear).
- Open General.
- Under Tour name, type the property's name, such as "2-bedroom flat with a terrace", up to 100 characters.
- Under Description, write 2 or 3 sentences about the home, up to 500 characters.
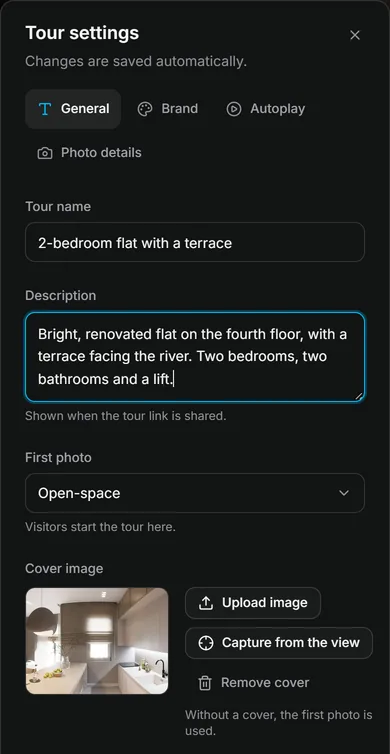
Vistura saves each change by itself. You can also type the name at the top of the editor, next to Tours.
Upload a cover picture
- In General, under Cover image, select Upload image.
- Pick a JPEG, PNG or WebP picture up to 25 MB, such as your best photo of the front of the home.
Or take the cover from a view of the tour
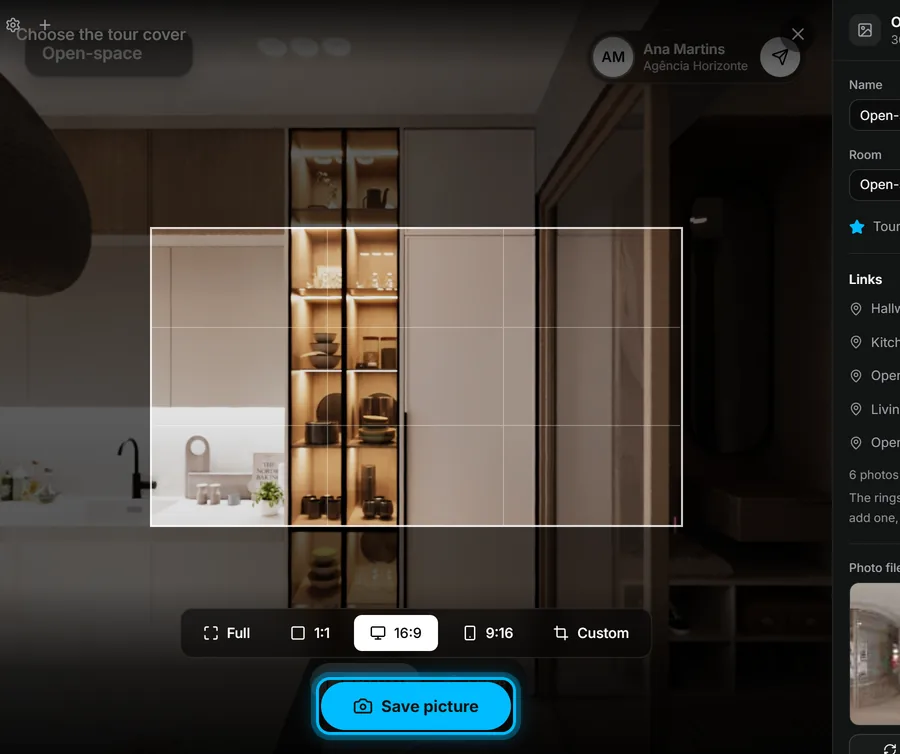
- Under Cover image, select Capture from the view. Tour settings close, and Choose the tour cover shows over the photo.
- Turn the view until it shows the room at its best.
- Choose a frame: Full, 1:1, 16:9, 9:16 or Custom.
- Select Save picture. Tour settings open again, with the new cover.
Result your dashboard card, the link preview and your public profile show the tour's name and cover, and the preview and Google show its description.
Was this helpful?
Thanks for telling us.
Sorry it did not help. Write to us and we will answer: support@vistura.app
More in this section: Build the tour
- Add, replace and download photos
- Organise rooms and floors
- Name the tour and choose its cover
- Link the rooms so buyers can walk through
- Property details, location and what's nearby
- Add notes, photos and buttons inside a room
- Add or change a contact form
- Add a floor plan to your tour
- Add a video (drone or walk-through)
- Narrate the rooms and run a guided tour