Use photos from a 360 camera
- All plans
- Computer or phone
- Updated
To use a 360 camera with Vistura, export the photos from the camera's app as JPEG and upload them from Create tour > Upload 360° photos. Each photo becomes one spot in the tour. It works on every plan, on a phone or a computer.
Before you start
You need the 360 photos as JPEG, PNG or WebP files, each up to 25 MB, on the phone or computer you work on.
Steps
Take the photos
- Put the camera on a tripod at the same height in every room.
- Place it near the middle of the room, away from furniture.
- Turn on the lights and open the inside doors.
- Start each photo with the camera's timer or its app, and step out of the room, so you are not in the photo.
- Take the rooms in the order a buyer walks through the home.
- In the camera's app, export each photo as a full 360 photo in JPEG. A full 360 photo is twice as wide as it is tall.
Upload them to a new tour
- On your dashboard, select Create tour, then Upload 360° photos, and add the photos: see Add, replace and download photos.
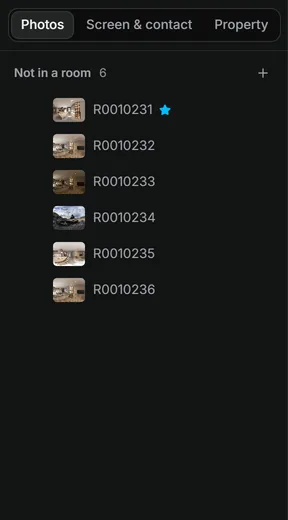
Tidy them up
- Give each photo the room's name: the photo's More actions > Rename. See Organise rooms and floors.
- Choose where the tour starts: the front door photo's More actions > Start the tour here. See Add, replace and download photos.
Result the tour has one 360 photo per spot, in the photo list. Next, link the rooms so buyers can walk through.
Was this helpful?
Thanks for telling us.
Sorry it did not help. Write to us and we will answer: support@vistura.app