Hide the tripod in your 360 photos
- All plans
- Computer or phone
- Updated
To hide the tripod at the bottom of your 360 photos, select a photo in the Vistura editor and choose a cover under Hide the tripod, then apply it to every photo at once. On Free, the cover is the Vistura disc. Filling the floor in, a colour disc and your logo need Pro or Business.
Steps
- Open the tour in the editor and select a photo in the photo list. Its settings open (on the right on a computer).
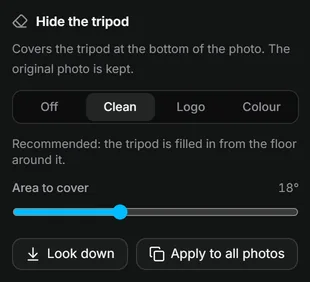
- Under Hide the tripod, choose a cover. The view turns to look down at the floor.
- Clean: the tripod is filled in from the floor around it. It suits most floors.
- Logo: a disc with your logo.
- Colour: a plain disc in the colour of the floor.
- On Free: Vistura, the Vistura disc in the colour of the floor.
- Drag Area to cover until the whole tripod is covered, and no more.
- On Pro, for a disc, pick its colour under Disc colour if the one Vistura chose does not match the floor.
- Select Apply to all photos (it shows once the tour has two or more 360 photos). Vistura covers the tripod in every 360 photo of the tour, one after the other.
Result buyers see a clean floor, a disc or your logo under each spot, instead of the tripod. Your original photos stay as they are, so you can change the cover at any time.
Was this helpful?
Thanks for telling us.
Sorry it did not help. Write to us and we will answer: support@vistura.app