Add your logo and colours to your tours
- Plan: Pro
- Computer or phone
- Updated
In Vistura, you add your logo and colours once in Settings > Brand & domain, and every tour shows them instead of the Vistura badge. One tour can have its own brand in Tour settings > Brand. Your brand needs Pro or Business on your account.
Before you start
Have your logo as a PNG or JPG file, up to 5 MB. A PNG with a transparent background suits any photo.
Steps
Set your brand for every tour
- On your dashboard, in your personal space, open Settings, then Brand & domain.
- Under Logo, select Upload logo and pick your logo.
- Under Colours, set Main colour, Background colour and Text colour. The preview at the top shows a tour with them.
- Under Branding on new tours, keep My branding.
- Select Save brand at the bottom.
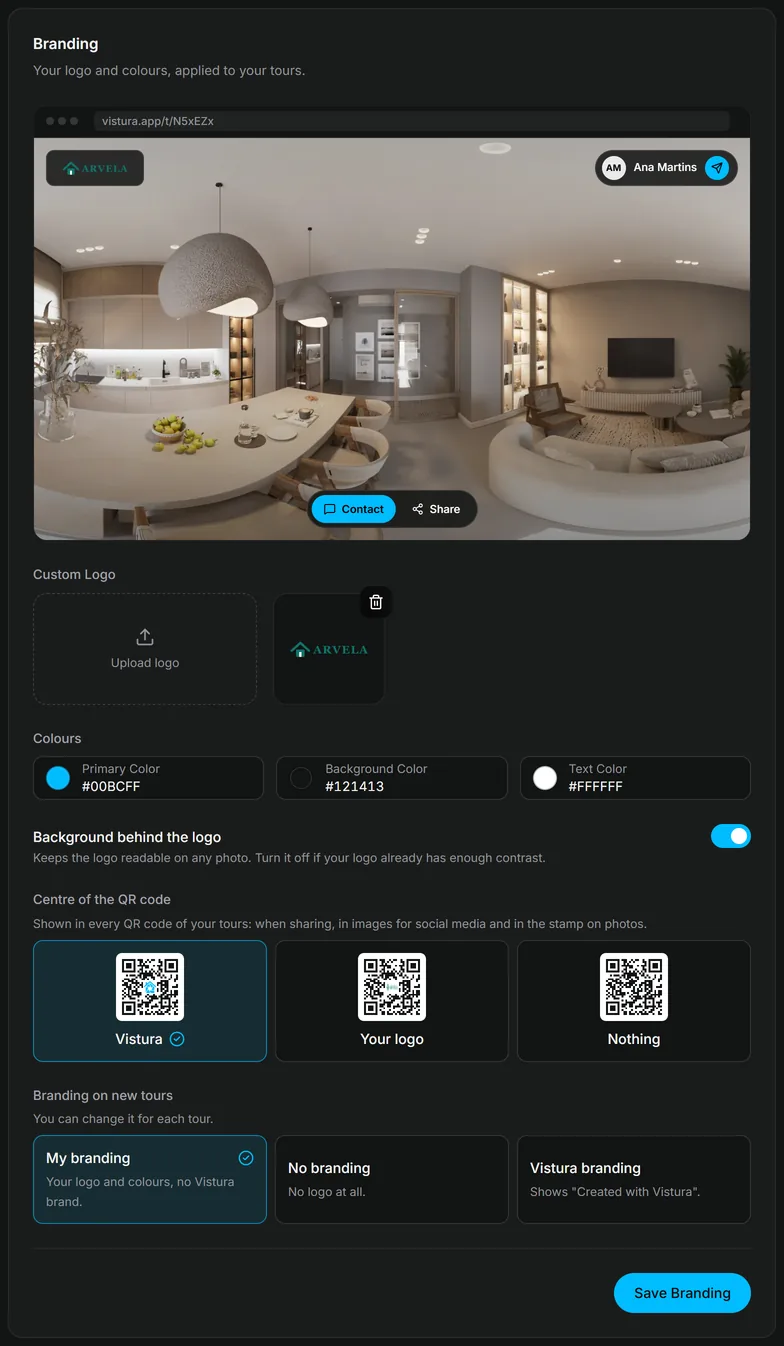
Give one tour its own brand
Use this for a development, a partner's listing or a second agency.
- Open the tour in the editor. At the top of the photo list, select Tour settings (the gear). On a phone, open the photo list first with the panel button at the top left.
- Open Brand.
- Under Brand shown in the tour, choose Custom for this tour. To start from your account's brand, choose My agency and select Customise for this tour instead.
- Upload the logo and set Main colour, Background and Text. The tour saves by itself.
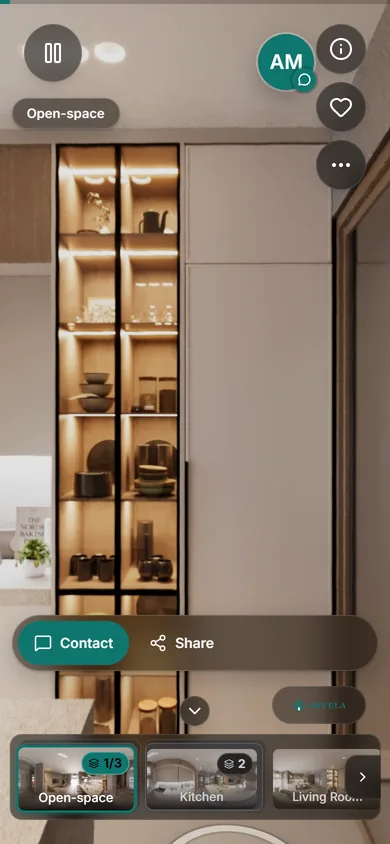
Result buyers see your logo at the bottom right of the tour and your colours on its panels and buttons, with no Vistura badge.
Was this helpful?
Thanks for telling us.
Sorry it did not help. Write to us and we will answer: support@vistura.app