Set up every new tour the way you like
- All plans
- Computer or phone
- Updated
In Vistura, Settings > Preferences sets what every new tour starts with (your agent card, the buttons, the room name, the visitor buttons) and how every new link between rooms looks. You set it once, and it saves by itself. It works on every plan.
Before you start
These choices apply to the tours you make from now on. Tours you already have keep their own settings.
Steps
Choose what a new tour starts with
- On your dashboard, open Settings, then Preferences.
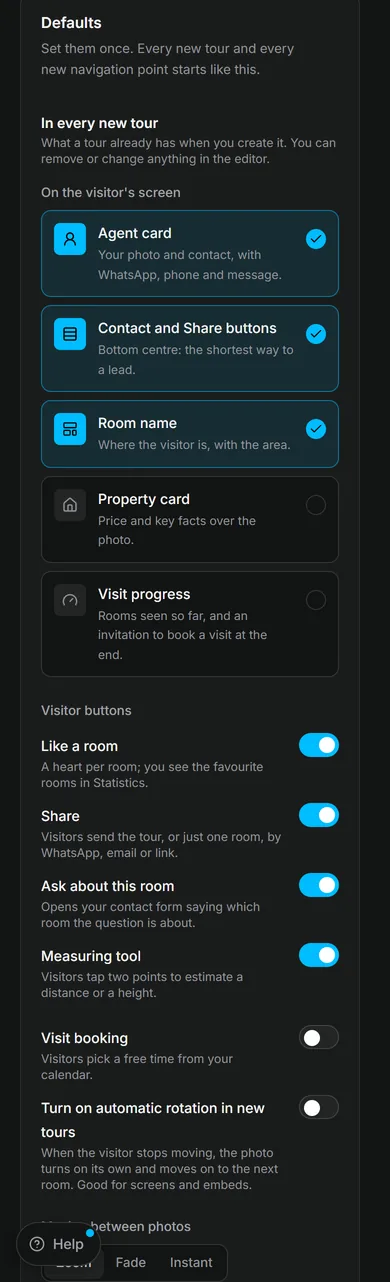
- Under On the visitor's screen, select a card to turn it on or off: Agent card, Contact and Share buttons, Room name, Property card and Visit progress. The first three start on.
- Under Visitor buttons, choose the buttons buyers get on the right of the tour: Like a room, Share, Ask about this room and Measuring tool.
- Turn on Visit booking so buyers can book a viewing from every new tour.
- Turn on Turn on automatic rotation in new tours to start the guided tour by itself in new tours, for screens and your website.
- Under Moving between photos, choose Zoom, Fade or Instant.
Choose how the links between rooms look
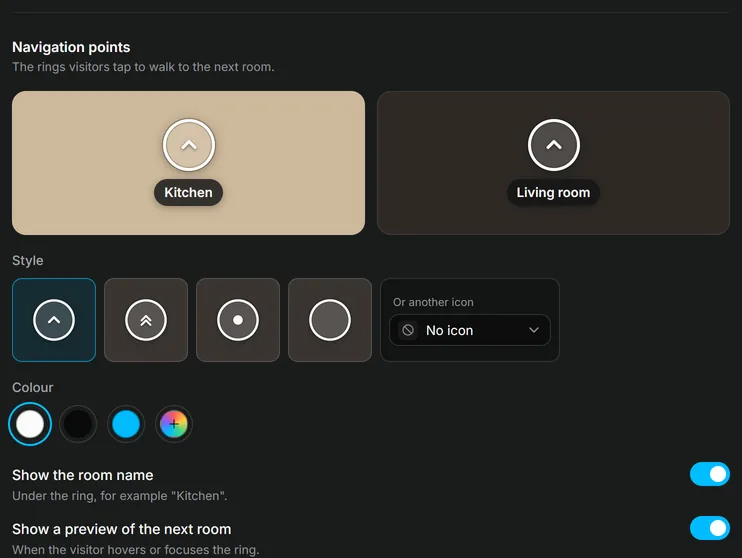
- Further down, under Navigation points, pick a Style: Arrow, Double arrow, Dot or Ring. For any other icon, use Or another icon.
- Under Colour, pick White, Black, My brand or Pick a colour.
- Turn Show the room name and Show a preview of the next room on or off.
The two sample rooms above the choices show the result on a light and a dark floor. Every new link uses this look; links you already placed keep theirs, and you can change any of them in the editor.
Result the next tour you create opens with these elements and settings, and every link between rooms you add uses this look. The top of the card shows Saved.
Was this helpful?
Thanks for telling us.
Sorry it did not help. Write to us and we will answer: support@vistura.app