How to make a virtual tour of a house, step by step
How to make a virtual tour of a house: plan one spot per room, shoot with a 360 camera or your phone, link the rooms, check every photo and share one link.
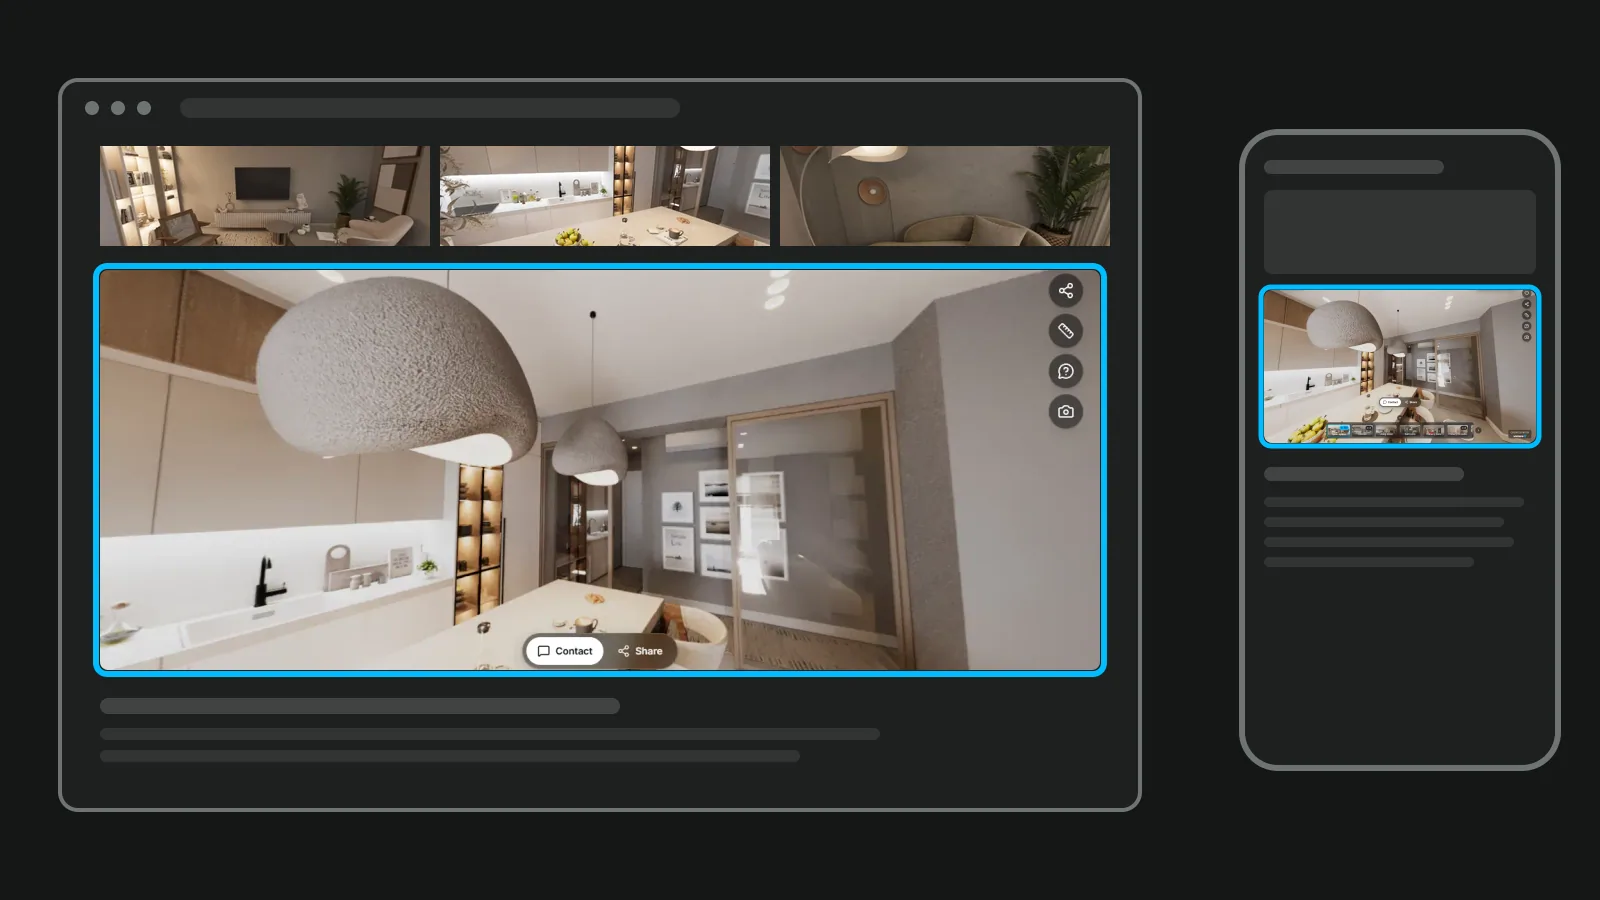
Here is how to make a virtual tour of a house: plan one spot per room, take a 360 photo from each spot, link the photos at the doors, check every room and share one link. With a phone you can do the whole home in one visit; a 360 camera gives sharper photos and needs less care in small rooms.
The six steps, in the order you do them:
- Plan the spots before you shoot.
- Get the home ready.
- Take one 360 photo from each spot.
- Build the tour and link the rooms.
- Check every room before anyone sees it.
- Publish and share the link.
If you first want to know what a tour is and why buyers use it, start with the guide to the real estate virtual tour. This article is the practical part.
What you need
- A camera for the 360 photos. Either a 360 camera on a tripod, or your phone with an app that captures 360 photos. To choose a camera, see 360 camera for real estate.
- A tripod. Essential with a 360 camera, and it gives cleaner joins with a phone in small rooms.
- Tour software to link the photos into a walk, host the tour and give you one link to share.
You can make a virtual tour with your phone, but not with the camera app alone. An iPhone has no 360 mode: its Pano mode is a single sweep along a line, which gives a wide flat strip rather than a full sphere (Apple, Take panoramic photos). The phone technique is in how to take a 360 photo on iPhone.
Doing it yourself or hiring a photographer is mostly a question of budget and time; how much a virtual tour costs compares both.
Step 1: Plan the spots before you shoot
A spot is where the camera stands for one 360 photo. Good spots make the tour easy to walk; bad ones leave buyers lost in a corridor.
- Walk the home once from the front door, the way a buyer would, and note each room you pass.
- One spot per room, near the middle and away from furniture, so the camera sees every wall.
- Two spots for a long or L-shaped room, one at each end, so nothing hides round the corner.
- One spot in each hall or landing that joins rooms. These are the crossroads of the tour.
- Write the spots in walking order and shoot in that order.
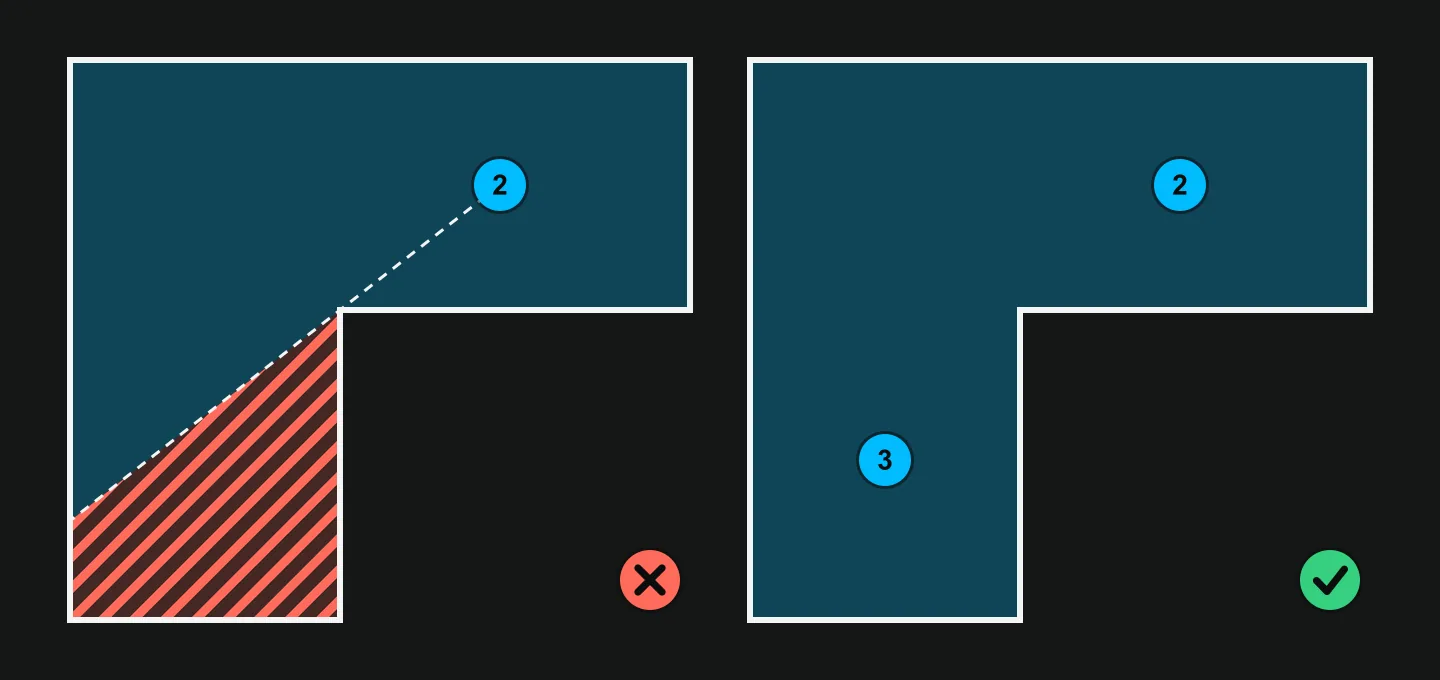
The National Association of Realtors' guide gives the same rule of thumb: usually one shot per room, two or three for large rooms (NAR, A step-by-step guide to creating a virtual home tour, 2020, archived).
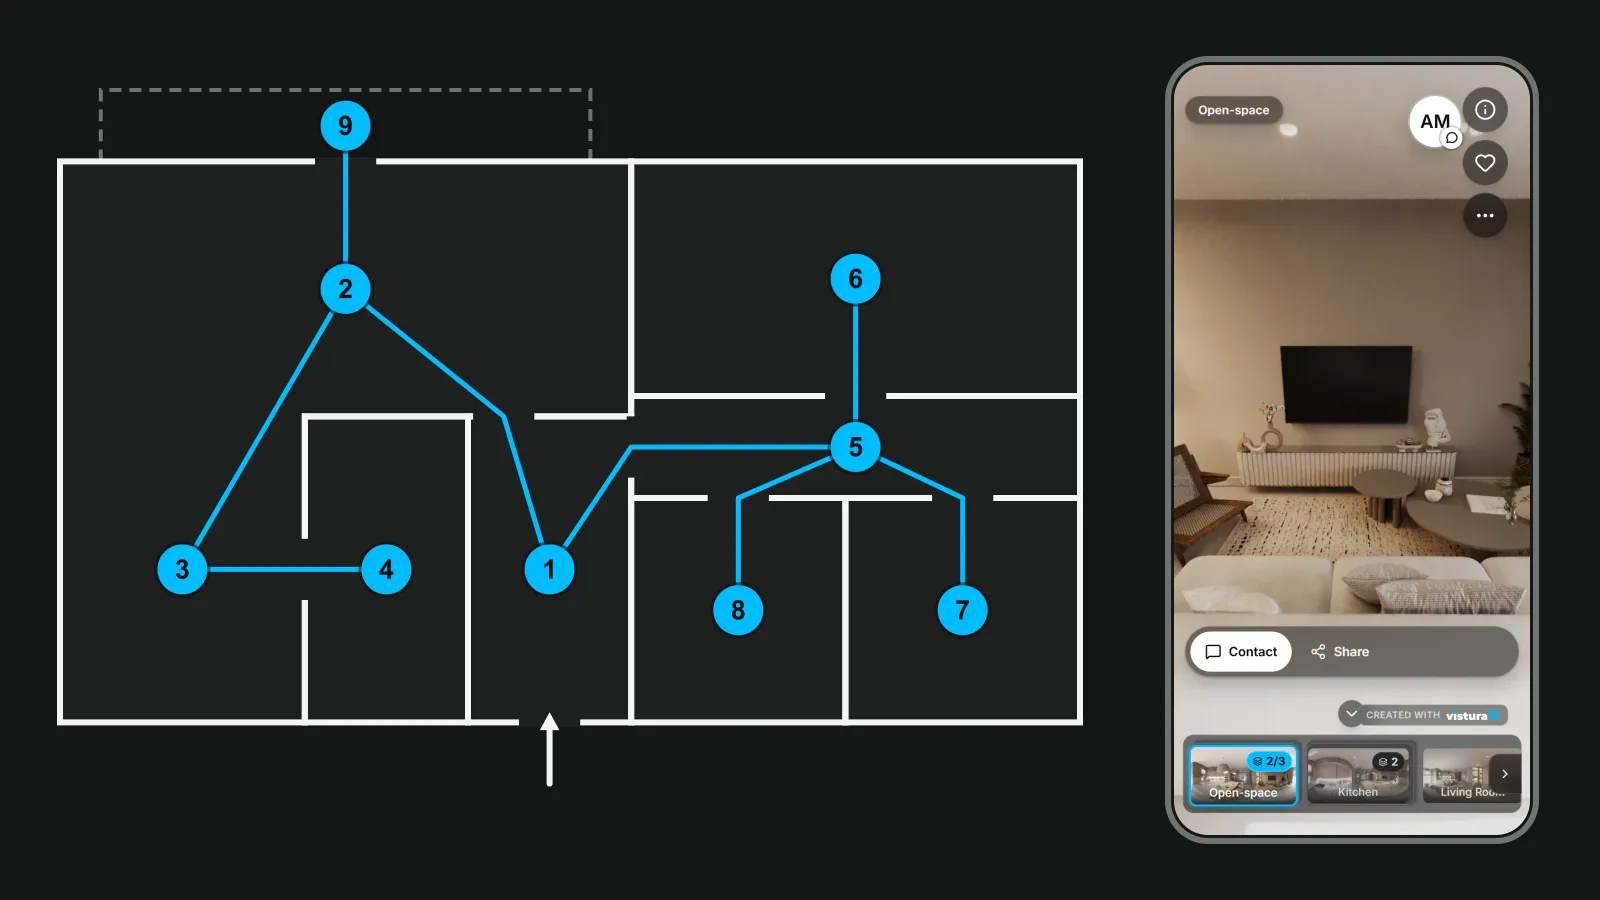
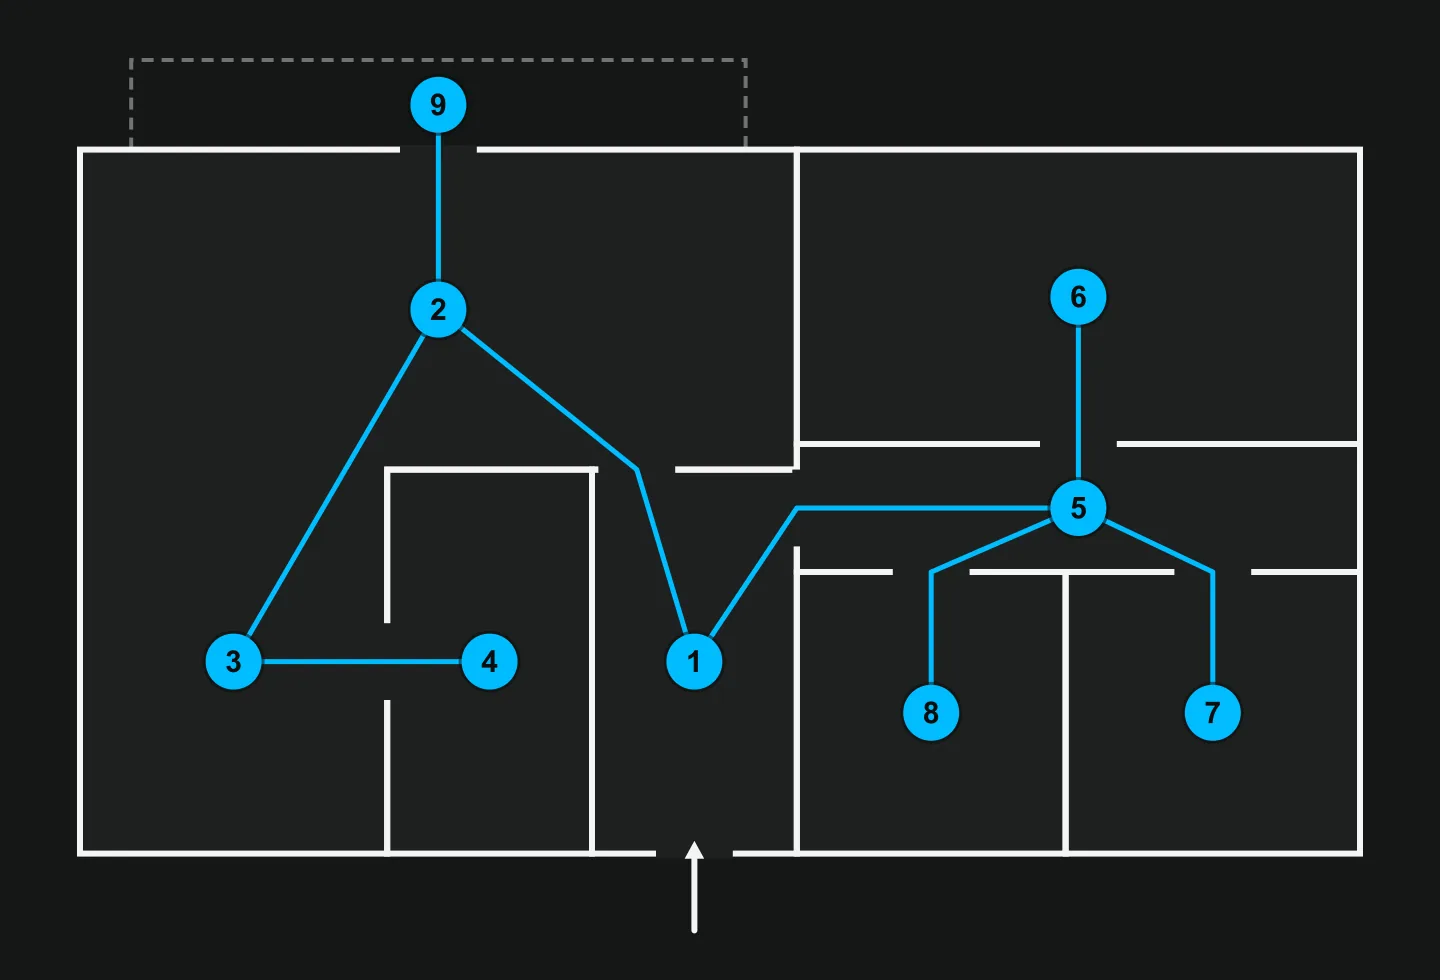
A worked example: a two-bedroom flat
This is an example, not a rule. Your floor plan decides the spots.
| Spot | Where to stand | Links to |
|---|---|---|
| 1 Entrance hall | In the middle, facing the front door | 2, 5 |
| 2 Living room, window side | Middle of the seating area | 1, 3, 9 |
| 3 Living room, dining end | Middle of the dining area, round the corner of the L | 2, 4 |
| 4 Kitchen | Centre of the floor, clear of the worktops | 3 |
| 5 Corridor | Halfway along, level with the bedroom doors | 1, 6, 7, 8 |
| 6 Bedroom 1 | Between the foot of the bed and the wardrobe | 5 |
| 7 Bedroom 2 | Middle of the free floor | 5 |
| 8 Bathroom | Tripod in the centre of the floor | 5 |
| 9 Balcony | Middle, with the view in front of the camera | 2 |
Nine spots for a two-bedroom flat. For a house, add the stairs landing and the garden. Outside, a 360 photo shows the neighbours' houses and the cars in the street, so choose the angle and the moment.
Step 2: Get the home ready
A 360 photo has no "behind the camera". Whatever is in the room is in the picture.
- Every light on, including lamps and the lights over the hob.
- Inside doors open. They are where the links will go.
- Floor clear around each spot: bags, shoes, cables and pet bowls away.
- Family photos, letters and anything with a name on it put away, along with medicines and valuables.
- Curtains and blinds set the way they will stay for every photo.
- Everyone out of the room while the camera works, pets too.
Agree a time with the owner, and ask them to leave the rooms as they will be on a viewing.
Step 3: Take one 360 photo from each spot
Shoot in the order of your spot list. Keep the camera at the same height in every room, so the walk feels level when buyers move from one photo to the next.
With a 360 camera
- Tripod at about chest height, the height Zillow's guide suggests (Zillow, 360 camera guide), and the same in every room.
- Start the shot with the timer or the camera's app and step out of the room, or behind a door.
- Export JPEG. A full 360 photo is twice as wide as it is tall, a 2:1 ratio (Google Maps, photo sphere requirements).
- Keep the camera facing the same way in every room if your software builds a floor plan from the photos. Some platforms ask for this, such as Tourbuzz's capture instructions.
With your phone
Vistura Capture runs in the phone's browser, so there is nothing to install. It guides you round the room, takes the photos and joins them into one 360 photo: about 24 photos per room once it has measured your phone's lens, 35 on the very first room. In the app, tap "New property", then "Add a room" for each spot, and the rooms arrive in your tour in the order you capture them. Capturing is free; to send rooms to a tour you sign in, and the free plan is enough. A tripod keeps the phone steady and gives cleaner joins in small rooms.
For the technique (turn round the lens, not your body), see how to take a 360 photo on iPhone.
Whichever you use, look at each photo on the screen before you leave the room. A second trip for one bathroom costs far more than a look now.
Step 4: Build the tour and link the rooms
This is how to create a virtual tour of a house from a set of 360 photos: you turn separate rooms into a walk.
- Upload the photos in walking order and name each room the way a buyer would: "Kitchen", "Bedroom 1", not "IMG_0412".
- Choose the start photo: the one by the front door. Buyers expect to arrive where a viewing starts.
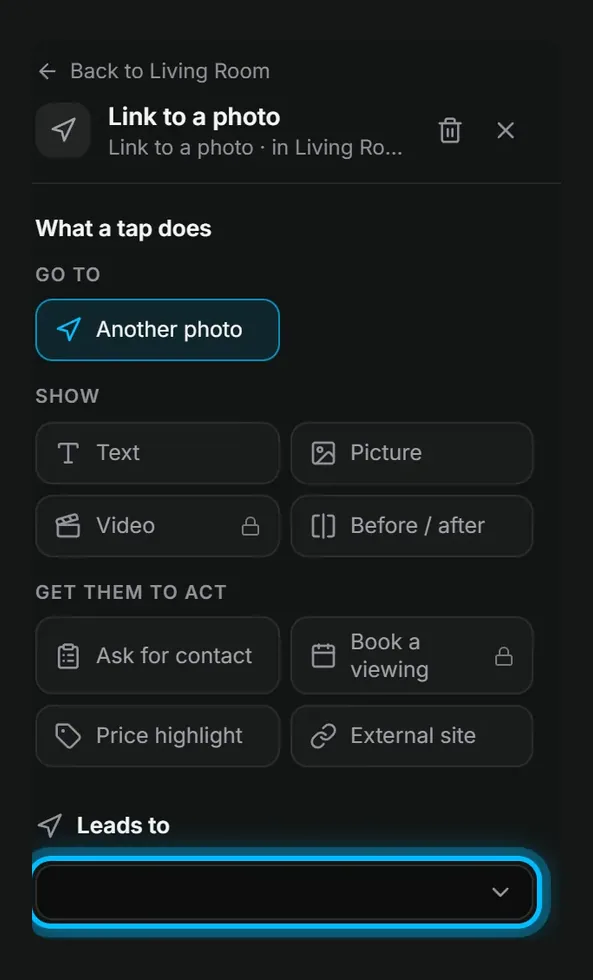
- Place the links on the doors, at floor level, pointing to the next room. A link on the door frame reads like a step forward.
- Link both ways, so buyers can walk back to where they came from.
- Link every room off a hall from the hall photo, which makes the hall the place to return to.
- Add points of interest sparingly: a note or a photo on what sells the home, such as the new boiler or the view, not on every object.
- Add a floor plan (Pro) in larger homes, with one marker per photo, so buyers see where they are. See real estate floor plan for how to get one.
Test the walk
- Open the tour on a phone, not the computer you built it on.
- Start at the front door.
- Reach every room by its links.
- Walk back to the start.
- Check that no link points at a wall and no room is a dead end.
In Vistura you do this in the editor, in a phone browser or on a computer. Rooms, floors and links come on every plan: "Start the tour here" sets the start photo, and "Point on the photo" adds a link to the next room, a note, a photo, a web link or a contact form. Your agent card and contact form are already on every new tour. On Pro you also add the floor plan with a marker for each photo, a video and narration.
Step 5: Check every room before anyone sees it
Go through each photo once more, with this list. The tools below run free in the browser, with no account. In a Vistura tour you need no separate tool for leaning walls, the tripod or the GPS position: the upload removes the camera metadata and makes lighter versions for phones, "Straighten automatically" levels a photo on every plan, and on Pro and Business "Hide the tripod" covers every photo at once. The free tools stay right for a file you send outside a tour.
- The walls lean: straighten the 360 photo.
- The tripod shows at the bottom: cover the tripod.
- A face shows in a mirror, a window or a photo on the wall: blur faces.
- The files carry the GPS position of the home: remove the metadata before you send photo files to anyone.
- A file is too heavy for your portal or website: compress the 360 photo.
- You want to see a photo in 360 before you upload it: open it in the 360 photo viewer.
- Names on post, a number plate in an outdoor shot, a screen left on: blur or retake.
Then show the tour to the owner before it goes public: send them a link that search engines do not list, or walk them through it on your screen. They know their home and will see what you missed.
Step 6: Publish and share the link
Make the tour public, then put the link where buyers already look.
Listing portals, by country. Rules change, so check your portal's or MLS's current help pages before you list.
- UK, Zoopla: only tours from approved players show inside the listing; other tour links open from "More information > Additional links" (Zoopla support).
- UK, Rightmove: YouTube and Vimeo embed, and other secure links open in a pop-up. You add tours in Rightmove Plus under Media, "Additional media", or through your CRM if you send a feed (Rightmove customer FAQ).
- US, MLS: check your MLS's rules for its virtual tour field, and for branding in that field and in listing photos, before you paste a link.
Everywhere else:
- Send the link on WhatsApp or by email to everyone who asks about the home.
- Put a QR code on the board and the flyer; QR codes for real estate signs shows where it scans best.
- Add the tour to the listing page on your own website.
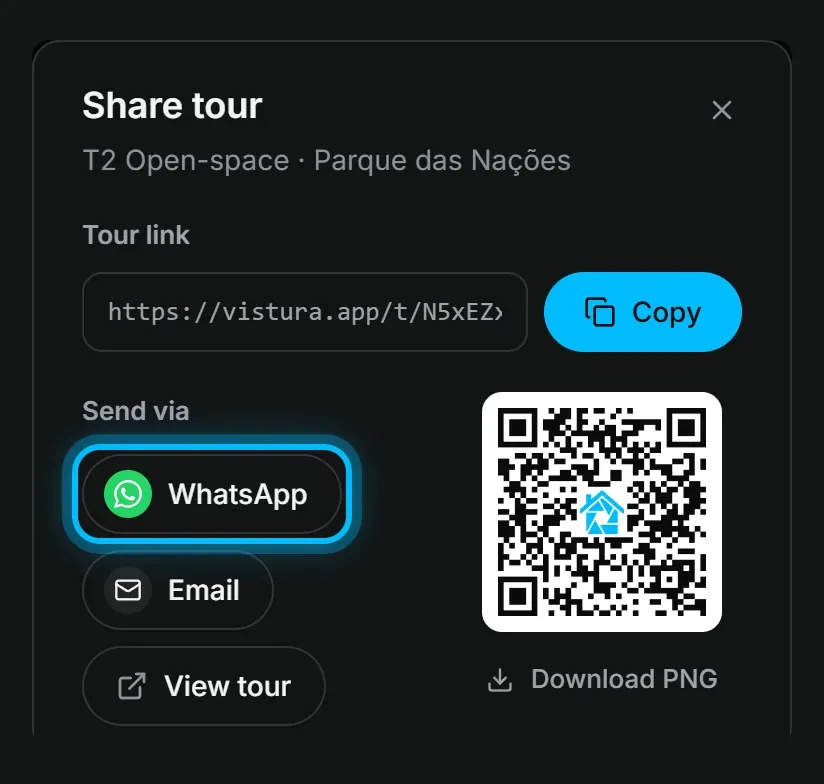
In Vistura, Share gives you the link, the tour QR code, a WhatsApp message and the embed code on every plan. Free keeps 3 tours online at a time with Vistura's brand, so you can try it on a listing. If you list every month, Pro is the plan to work on: unlimited tours, your logo and colours, the tripod removed automatically or covered with your logo, the floor plan, and advanced statistics on where buyers came from and which rooms they looked at. Compare the plans.
That is how to make a virtual tour that buyers can walk on their own: spots planned, rooms linked at the doors, every photo checked, one link shared.
Frequently asked questions
How many 360 photos do I need for a virtual tour of a house?
Plan one 360 photo per room, plus one in each hall or landing that joins rooms. A long or L-shaped room needs two, and the National Association of Realtors' guide suggests two or three for large rooms.
Can I make a virtual tour without a 360 camera?
Yes. A phone can take 360 photos with an app that guides you round the room and joins the shots, such as Vistura Capture in the phone's browser. An iPhone has no 360 mode of its own: its Pano mode takes a flat strip, not a full sphere.
Should the owner see the tour before it goes online?
Yes. The owner knows what is personal in the home and will spot a family photo or a letter you missed. In Vistura on Pro, choose "Public" under "Who can see it" and turn off "Show in Google and other search engines": only the people you send the link to will see the tour. Turn it back on once the owner agrees.
Do I need a floor plan in the tour?
No, a tour works without one. In a larger home or one on several floors, a plan with a marker for each photo helps buyers see where they are and how the rooms connect. In Vistura the floor plan is on Pro.